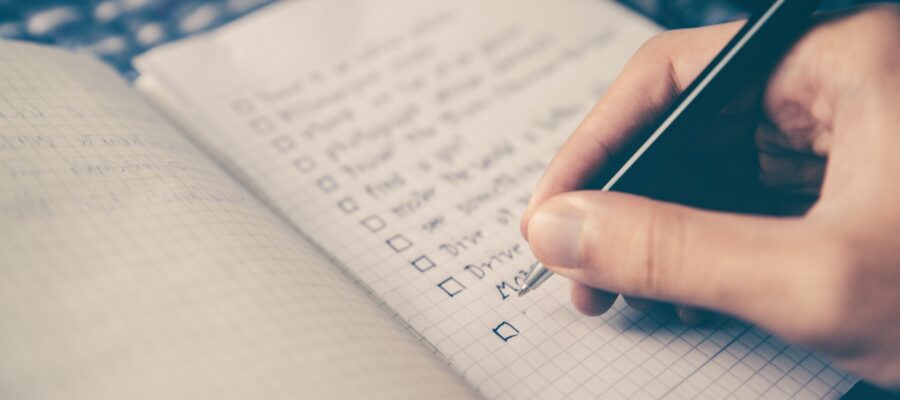
Have you ever been annoyed by your to-do list? Tasks, appointments and entire projects get mixed up. Prioritizing, sorting and implementing individual items becomes difficult: what comes first? What is important? And how should you implement something like “start a Facebook group” or “paint your apartment”? These are not tasks, but entire projects, each with individual tasks.
At the latest when you come across a project, you need more than a to-do list. Of course, you can start by creating your own list for each project and writing down everything that comes to mind in terms of implementation steps. If you plan several such projects, things get quite confusing.
This is where my favorite tool, Trello, comes in. Organize your projects and tasks on three levels:
- Noticeboards: the big overview that I like to use for private and professional settings, but also for broader projects and goals
- Lists: Each tab can contain multiple lists next to each other. Here you can record one project at a time or, if you work according to the Kanban method, the phases of a project.
- Cards: Cards are basically a (project) task that you date, categorize with labels, and assign to an employee (if you have one).
Cards may also contain one or more checklists. This gives you a fourth layer to get organized.
Create Trello checklists
If you already know something about Trello, in this article you will find all the advice on how to flexibly manage projects and tasks with Trello checklists. In my example, I’m creating a board for the project «Write a blog post about Trello checklists», i.e. for this post
Now the individual project steps should first be recorded in a checklist. You create a checklist in the right sidebar of your map in the «Add to map» section and give the list a title. Each tab can also contain multiple checklists, for example if you want to plan multiple phases of your project.
Now collect all your project tasks. You don’t have to worry about order with Trello checklists, because you can reorder checklist items at any time using drag and drop.
Complete tasks with the Trello checklist
Now go to work and complete one item at a time. Then you can of course tick off the completed tasks in the checklist – a great feeling.
Completed tasks appear with the task text crossed out, and the percentage of tasks completed against all checklist items is displayed above the checklist. You can also see your progress in the list view: 2/7 means you’ve checked off 2 out of 7 items on your checklist.
If you click on an entry in the list, you will find further checklist functions under the entry:
- With the smiley you have access to some emoticons to comment on your text. A warning triangle, a thumbs up and facepalm for annoying things are almost everything. If that’s not enough for you, you can upload your own emoticons.
- The @ sign allows you to mention people who are connected to the board or card.
Get more done with checklists
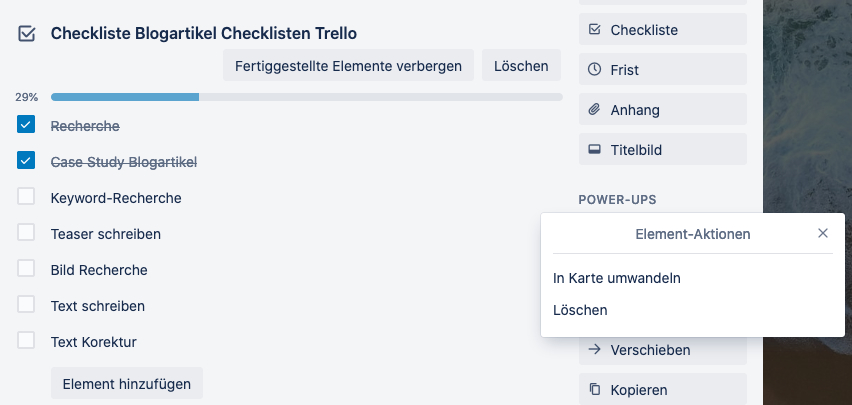
If your checklists are very long, you can make completed tasks invisible using the «Hide Completed Items» button. Your stats (29% done, 2/7 done) still remain visible. You can cancel the process in the same place using «Show flagged items». Of course, you can also completely delete a checklist that has become obsolete (“Delete” button).
If you hover over the checklist item (or click on the item below), you’ll see many more options. Click on the 3 dots and you will know which promotional items are also available in free accounts:
- Convert to Paper: This is the real magic of the 4th level. You can create your own board from each checklist item, which can then be moved from the project to your weekly list, daily to-do list, or your Kanban board. Here you can provide him with additional information, such as a file attachment or a comment.
- Delete: You can of course also delete a list item if it is no longer needed.
This way you can first record entire projects in a list. When it comes to more detailed planning and implementation, each checklist item becomes a card that is placed in the same list as the checklist card. From there you can move them wherever you want.
Copy Trello checklists
Checklists are actually intended for error-free execution of recurring jobs – think airplanes and maintenance jobs. My sample checklist for creating a blog post would also be a case in point. So, if you repeatedly implement certain tasks and have a proven checklist for the processes, you can simply copy it into your paper while creating it.
To do this, select the appropriate one from the list of your cards on the board that feature a checklist.
More features with Trello Business Class
In the premium version of Trello, aimed specifically at teams, two additional functions are available. You can find it by clicking on the item, under the text next to the emoticon:
- Assign: Here you can assign a task to a board or charter member. The person will then receive a notification about this, if the settings allow it.
- Due date: Here you can set a due date for the task. If you use a calendar booster, you’ll see these list items under the due date.
latest posts published

Are you starting to run? This is how we persevere!

Your time invested profitably every day: What are your EPAs?
Energy flat rate: who is entitled to the 300 euro bonus?

Here’s how companies choose the right solution

Set and achieve goals with SMART

Different working models and employee retention: a connection?

Flexible working hours
Personal Kanban in the notebook: be productive

Reporting for effective workforce management